smooth video from any camera or smartphone
You are a filmmaker. Yes, you.
You probably take video with your smartphone on occasion and whether you want to admit it or not, that makes you are a filmmaker. Maybe you have a point and shoot camera, DLSR, mirrorless camera or a dedicated video camera too. At the end of the day, you should want to make better videos and one key way to making better videos (as there are many) is to have smooth stable footage. You can do this several ways: use a tripod, slider, jib, crane, gimbal or using built in image stabilization.

Nearly every newer smartphone or dedicated camera made nowadays comes with some form of built-in image stabilization. In principle, Optical Image Stabilization will try to lock-in on what it’s currently looking at. The camera will zoom in a little and while you’re moving the camera around slightly, the image will attempt to maintain the same relative position. Sensor Stabilization is also in higher-end cameras and the actual sensor moves around. If you’re photographing or filming a static subject with very little camera movement, you will have much more stable footage with minimal camera shake from your hands using built in image stabilization. (Read more about the difference between optical and sensor stabilization here.)
That’s good, right? Not exactly.
Built-in image stabilization is best used for taking photos in low light situations or when filming a static subject. When you begin moving the camera around intentionally, you’ll notice the footage become jerky. That’s because it’s trying to lock in on one subject and as you move the camera away from what is being viewed, it attempts to re-stabilize what’s now on screen. As you pan the camera, it will keep trying to “grab” the scene over and over. This leads to the jerky look in your footage.
It’s best to turn this feature off when shooting videos when the camera will be moving around. If you’re filming a giraffe eating at the zoo, leave stabilization on. If you’re filming your child’s soccer game, leave stabilization off. Most cameras will give you the option to turn off stabilization and some smartphones will too. For iPhone (iPhone 7+ and older as of this post) you need to buy a 3rd party app such as Filmic Pro to disable image stabilization. Why Apple doesn’t give this option natively is beyond me. I digress.
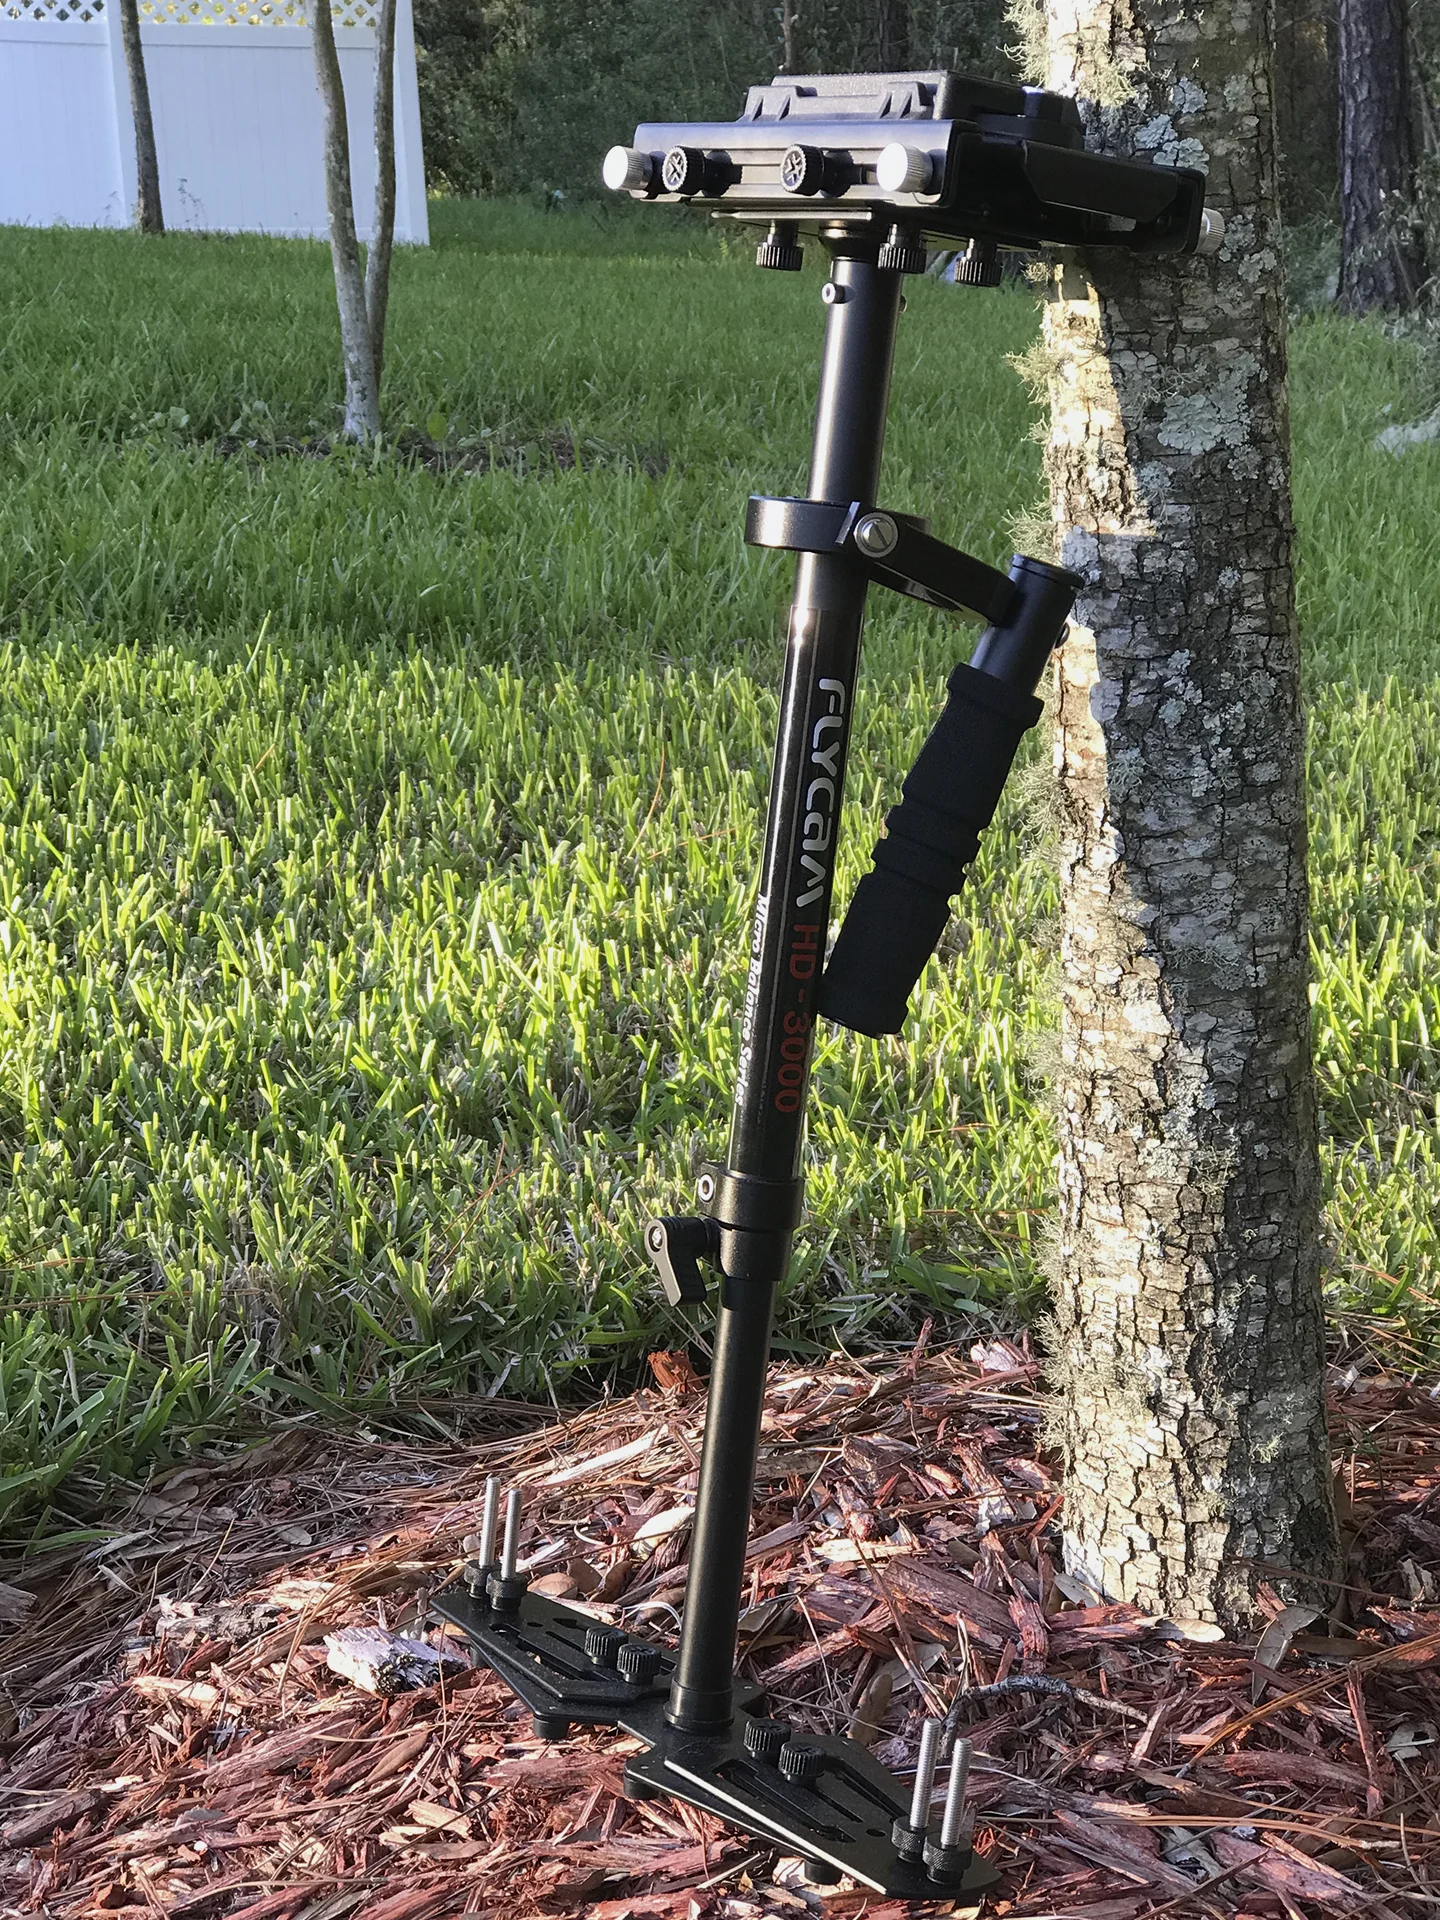
To get the best of both worlds, you should use a stabilizer or gimbal with image stabilization turned off (when it’s on you still get jerky footage). There are several types of gimbals depending on the type of camera you want to stabilize. They range from inexpensive gravity-based stabilizers to very expensive electronic ones. Gimbals and stabilizers exist for your smartphone, GoPro, DLSR or any other camera you may have. It’s important to get the correct gimbal made for your device and understand the pros and cons of each system.
Gravity based gimbals (stabilizers) are inexpensive compared to their electronic counter-parts, but they don’t provide the same benefits. They sometimes require more setup or balancing time, based on your application, and they require a whole lot of practice. Depending on how smooth you want your footage will determine how much practice you need. Stabilizers tend to sway left and right or have unexpected movements. However, a big benefit of this type of gimbal is that they help reduce the up/down walking motion that the electronic gimbal struggles to deal with. This is known as the z-axis.
An electronic gimbal is more expensive than a gravity based one. However, they have several benefits that help justify this cost. They have a much shorter learning curve, they’re generally easier to setup and balance, and they provide more stable footage without much practice. As mentioned earlier, these types struggle to smooth out the up and down walking motion. Don’t let this deter you. This can be helped by the “ninja walk” which is just making sure you walk smooth, flat and with bent knees. This takes some practice, but it easier than learning how to control a gravity gimbal in my opinion. Certain electronic gimbals also offer “4th axis” stabilization or “z-axis stabilization”. This will add cost to the gimbal, but is worth it in my opinion. This 4th axis stabilization in conjunction with the “ninja walk” and post-production image stabilization software lead to buttery smooth footage.
Whether you’re just taking videos of Suzie at her soccer game, Johnny in the play or you’re a professional creative, stable footage is one key factor to improving your videos. Determine the style of video you want to create and then research what type of stabilizer or gimbal is right for you. At the end of the day, it’s about making great videos and there is no one way.